Instructions
These instructions will guide users in making new accounts, creating simulation jobs, uploading input/data files, running simulations, and downloading simulation results.
Create Account
- If you are a college student or work in a research institute, please use "Sign in with CILogon".
- In this option, under "Select An Identity Provider", find your institute, then click "Log On" and sign in with your institute ID and password.

3. If you can't find your institute, you can use 'Google' OR create a local new account by providing a username, password, email, and name.
Note: Even after signing up (either through institution login, google, or a local account), you will not be able to access the computer resource until approved by an administrator. Please send an e-mail to justran@fullerton.edu to get approval.
Log In
After you have created your account, you can login to the gateway using either your institutional login or with your SimVascular gateway account, depending on which method you used to create your account.
Dashboard
When you first login to the gateway, you will be taken to the Dashboard, which should look like this:
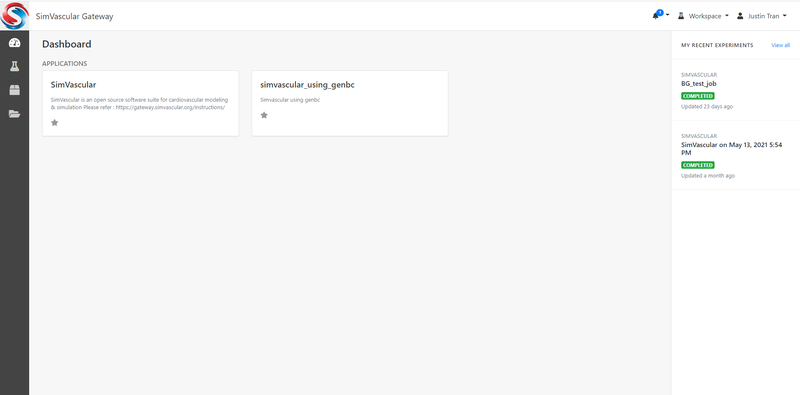
You will notice that in the middle of the Dashboard is a list of "Applications" for you to run, which lists out the types of simulations you can run on the gateway. There are currently two types of simulations you can run on the SimVascular gateway: 1. Default SimVascular or 2. SimVascular with GenBC. Most users will use the default SimVascular to run their jobs. The version with GenBC are for advanced users.
Another important aspect of the Dashboard is your list of "Experiments". These are all your current and past simulations that you have done on the gateway. You can use these to keep track of the simulations you have run or are currently running. Once a simulation is complete, you will need to access the corresponding Experiment's page to download your results.
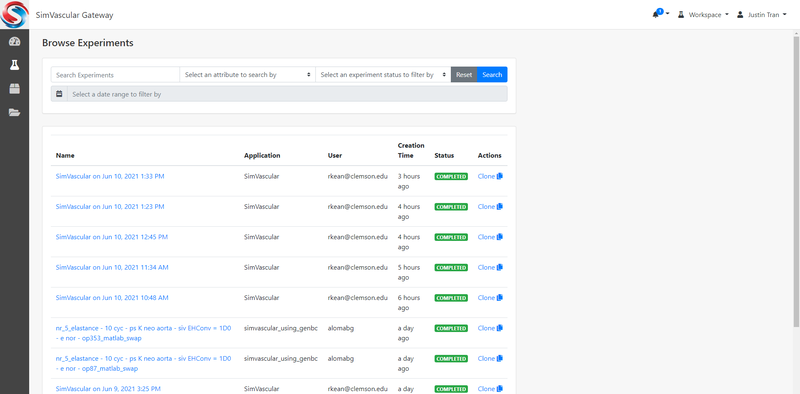
The right side of the screen will list your recent experiments, but you can view a more comprehensive list of all your experiments by clicking on the "Experiments" icon on the left-hand side of the screen (the icon looks like a beaker).
Create/Browse Projects
Projects are a way to organize your simulations. If you are running different types of simulations on the gateway (i.e. you are running simulations for different parts of the body), you can create different projects to organize this. Whenever you run a simulation, you will have the option to assign them to a Project so that later you can view all simulations in a given project.
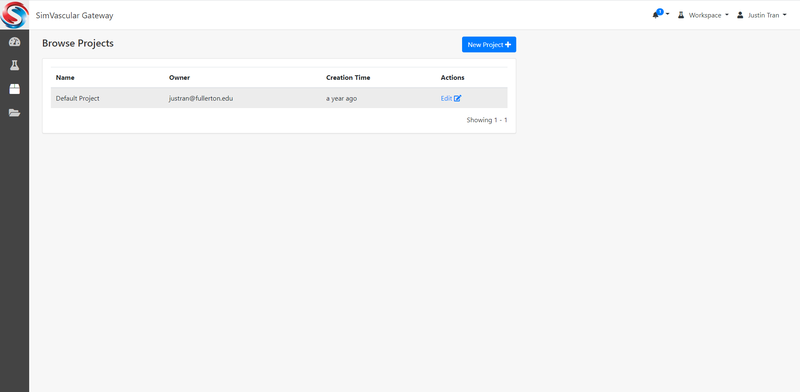
It's not required to create a new project. By default, "Default Poject" is already created for you. In one project, you can create multiple exeperiments (i.e. simulation jobs). Many users will just use the Default project.
To browse existing projects: click "Project" -> "Browse" at the upper-left corner.
To create a new project: click "Project" -> "Create" at the upper-left corner.
Create/Browse Experiments (Simulation Jobs)
To run a simulation on the gateway, you will need to make an "Experiment". You can create a new experiment by clicking on one of the available applications from the Dashboard (either SimVascular or SimVascular_with_GenBC). If you are unsure which application to choose, just click on SimVascular. This will take you to a new page where you will have the option to assign a name and project to your experiment:

A default name and project are assigned, but you may change these if you would like a more descriptive name for your simulation.
The next step is to upload all of your simulation inputs from SimVascular. There are five files that you need to upload to the gateway. All of these are created from the SimVascular front-end interface on your personal computer:
- geombc.dat.1 - This file contains the geometry and mesh for your model. Typically the largest file in terms of memory.
- restart.0.1 - This file contains the initial conditions for pressure and velocity in your model. In most cases, the velocity and pressure will initialize to 0.
- bct.dat - Contains information about the prescribed inflow boundary condition. This is a plain text file that you can open in any text editor, and it will contain the (x,y,z) velocities at each node of your inlet face(s) at all points in time.
- solver.inp - Contains all other simulation parameters such as the number of timesteps, timestep size, and the linear solver settings.
- numstart.dat - A simple text file that simply contains the number 0. Before uploading this file, please open it in a text editor (like Notepad) and verify that there is indeed the number "0" inside.
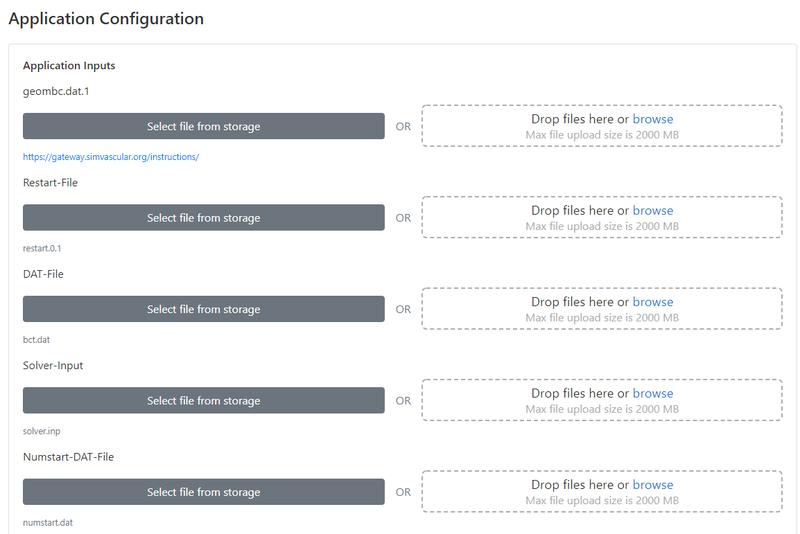
There is also a place for you to upload additional "Optional" input files. If your model contains RCR or coronary boundary conditions, this is where you would upload your rcrt.dat or cort.dat.
Once you have uploaded all of the input files, you will need to specify the allocation and cluster settings. First, you will have to select your allocation from the drop-down menu. Most users will only have access to one type of allocation depending on the user group that you belong to, but if you have access to more than one please select the appropriate allocation for your type of job (Default for educational/classroom use and Research for Research projects).
Next you will have to select the cluster parameters. Before selecting these parameters, it is good to first compute how many processors you should use for your job. Generally, you want to select the number of processors such that each processor will be responsible for an appropriate number of elements from your mesh. A good rule of thumb is to take the number of elements in your mesh and divide it by either 20,000 (for a steady simulation) or by 10,000 (for an unsteady simulation). If you are unsure, just divide by 20,000. This will give you the number of processors that you should use for your simulation.
If this computed number is less than 128, then you can run your simulation on the "shared" queue, which gives your job special high priority due to its small size.
If your job requires more than 128 processors, you will need to run your job on the "compute" queue, which has slightly different rule. Because of how account charging works on this cluster, any job that goes over 128 processors will need to be assigned in multiples of 128. Thus, you should round your number of processors to the nearest multiple of 128. For example, say your job would require 150 processors. We would round this DOWN to 128. But if your job requires 220 processors, you would round this UP to 256. If you are creating a job with that requires more than 128 processors (i.e. 256, 384, 512, etc.) you first need to set the number of nodes. Since each node on the cluster has 128 processors, you will set the number of nodes equal to the number of processors divided by 128.
After setting the number of nodes and processors, you will need to set the "Wall Time", which is the amount of physical time that you think your simulation will run for. If you are unsure about how long your simulation will take, just set this to the maximum allowable number. Once you get a feel for how long your simulations take, you can lower this as your desire.
The last thing you will see is a box to set the amount of memory your simulation will take. In most cases, you can simply leave this field BLANK and let the cluster use the default settings. You should only set this in very special scenarios.
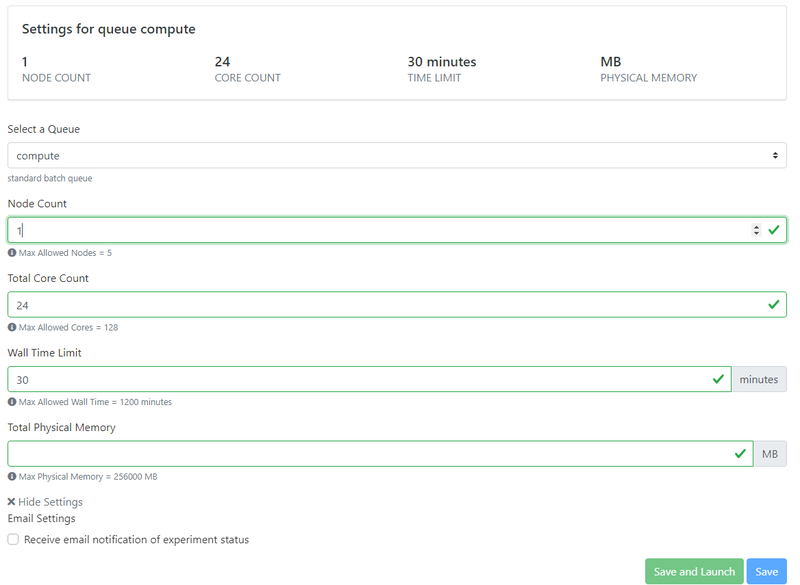
Once you are done, you can click the "Save and Launch" button at the bottom of the screen. If everything was set correctly, the gateway will launch your simulation on the cluster. You will then need to wait for the simulation to finish. The amount of time it will take will depend on the nature of your job (i.e. number of elements, number of timesteps, etc.) but it will also depend on the state of the cluster as well. Since we are running these simulations on a national supercomputer, there are hundreds of other researchers across the world using it at the same time. Often, you will have to wait for a spot on the cluster to open up to run your job. You can monitor the status of your job on the gateway, but please be patient in case the cluster is particularly busy at the time.
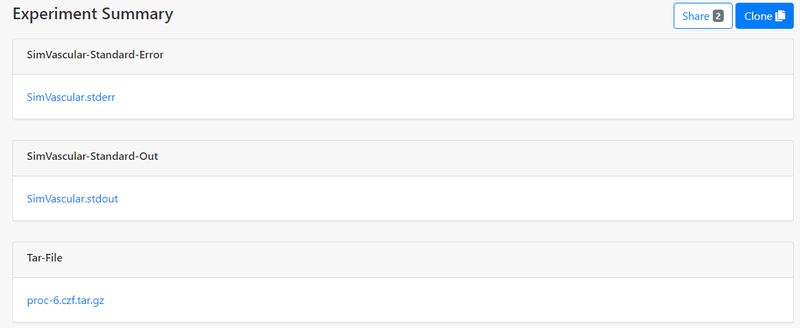
Download Results
Once the experiment is completed ("Status" becomes "COMPLETED"), go to the experiment summary page, files are available in "Outputs", and you can download proc-xx.czf.tar.gz which contains all simulation results. You can also click "Open" in "Storage Directory" to get a list of all input and output files and download specific files: